What To Do If Your Water Heater Is Leaking From The Bottom: A Step-by-Step Guide
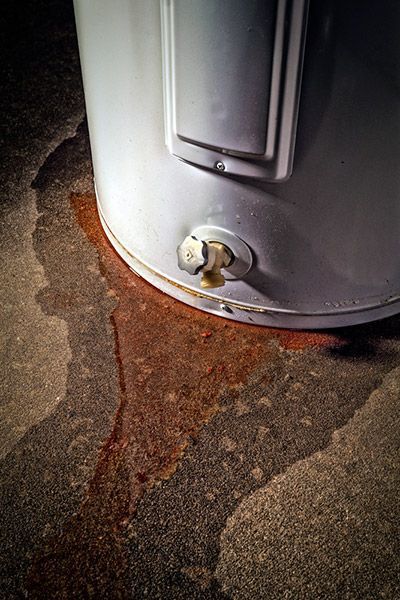 A water heater leaking from the bottom can be a stressful situation, especially if you're not sure where the water is coming from or how serious the issue might be. If you've noticed water pooling around the base of your water heater, it's important to take action quickly to prevent water damage and restore your hot water.
Here's what you need to know and what steps to take if you find your water heater leaking from the bottom.
Step 1: Turn Off the Power Supply
For safety, turn off the power to your water heater before taking any further steps.
Electric Water Heater: Go to your electrical panel and switch off the breaker dedicated to your water heater.
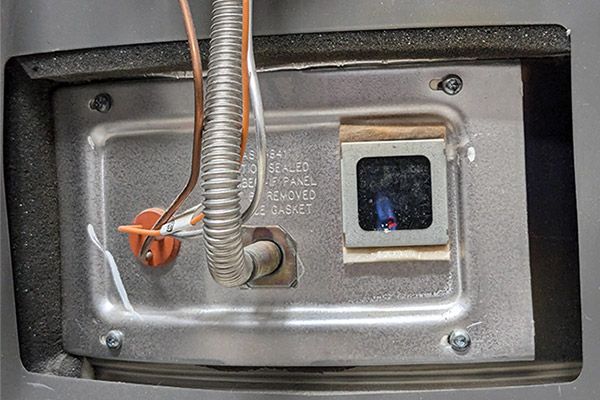
Gas Water Heater: Turn the gas control knob to the “Off” position to stop gas flow to the unit.
Step 2: Turn Off the Water Supply
Shut off the water supply to stop more water from leaking out of the tank and onto your floor. Locate the water shutoff valve near the water heater and turn it clockwise to close it. If the valve is stuck or hard to find, you can shut off your main water supply as a temporary measure.
Step 3: Find the Source of the Leak
Water heaters can leak from a few different areas, and finding the source of the leak can help determine the next steps. Check these common problem areas:
- Drain Valve Leak: The drain valve, located near the bottom, is used for maintenance and draining the tank. Sometimes it can be left slightly open or become faulty. If you notice water dripping from the drain valve, try tightening it with a wrench. If it’s still leaking, the valve may need to be replaced.
- Temperature and Pressure Relief Valve (T&P Valve): The T&P valve, usually on the side or top of the tank, releases water if the temperature or pressure inside the tank is too high. If the T&P valve is leaking, this could mean the pressure is too high. Avoid attempting to adjust or repair this valve yourself; it’s best to consult a professional.
- Internal Tank Leak: Sediment buildup can lead to corrosion inside the tank. If water is pooling around the bottom with no visible leaks from any valves or pipes, it could indicate a crack or leak within the tank itself. Unfortunately, an internal tank leak usually means the water heater needs replacement.
Step 4: Drain the Tank if Needed
If the leak is significant, you may want to drain the tank to prevent further water damage:
- Attach a garden hose to the drain valve.
- Run the hose to a safe drainage area, such as a floor drain or outside.
- Open the valve to let the water flow out safely.
Step 5: Decide if You Need Repairs or Replacement
Minor Valve or Pipe Leak: If the leak is coming from a valve or a connection, it may be a simple fix with a valve replacement or pipe repair.
Internal Tank Leak: If you determine that the leak is from the tank itself, replacement is typically the best option. When a water heater tank starts leaking internally, repairs are generally not effective, and a replacement water heater will likely be more cost-effective in the long run.
Step 6: Call a Professional Plumber
If you’re unsure about where the leak is coming from or you suspect it may be an internal tank leak, it’s best to call a licensed plumber. An expert can evaluate the situation, provide guidance on whether repairs or replacement are needed, and ensure everything is done safely.
Don’t Wait – Act Quickly on Water Heater Leaks
Addressing a water heater leak promptly can prevent water damage to your home, minimize disruption to your hot water supply, and keep repair costs lower. If you need assistance with a leaking water heater or want to discuss water heater replacement options, contact Ebens Air Conditioning & Plumbing for help.
You might also like
Ebens Air Conditioning Blog